Oatmeal Berry Crisp

So I have something to admit… I don’t have much of a sweet tooth. I generally pass on most dessert in favor of something more savory like cheese. I love cheese. Cake does nothing for me and, in general, I’m not a big fan of “sweets”. I know, you can unfriend me ; I’m a psycho who can’t be trusted.

But I have a couple exceptions and one of those exceptions is a really good fruit crisp. Mmmmmmm. I grew up visiting my grandparents in central California a couple times a year and their area is known for apricots. DELICIOUS, glorious, juicy apricots that make the very best jam, dried snack, cobbler, AND crisp. My grandma made an amazing apricot crisp almost every time we visited and my mom would make it back at home. I even had the honor of making crisp for my grandma’s 90th birthday bash and I was humbled by the compliments of those who had enjoyed her crisp for years!

Now, I’m going to blow your mind. This crisp can be eaten for dessert AND breakfast! SAY WHAAAAAAT?! Yes. If coffee cake and donuts are acceptable breakfast food then a fruit crisp MOST CERTAINLY is too! Here is how you get away with it… instead of topping it with ice cream you spoon a dollop of vanilla yogurt on there. Now it’s suitable for breakfast. You’re welcome.

I live in the Pacific Northwest and one of the best things to come out of our neck of the woods are berries. Raspberries, strawberries, blackberries, marionberries…we grow them to perfection here. I’ve tried to make my crisp recipe with apricots from Oregon and it just isn’t the same so I’ve stuck with berry crisp.

Here’s What You Need:

Fruit Portion:

4 Cups frozen berries or sliced stone fruit (apricots, peaches, plums)

1/4 cup sugar

1/4 teaspoon salt

Topping:

3/4 cup Old Fashioned Oats

3/4 cup All Purpose Flour

1/2 cup Brown Sugar

1/2 cup (1 stick) COLD butter

2 teaspoons pure vanilla extract

1/4 teaspoon cinnamon

1/8 teaspoon nutmeg (optional)

Here’s How You Do It:

  • Preheat oven to 375 and butter a 9×13 baking dish.
  • Combine the ingredients in the fruit portion and dump into baking dish.
  • Combine all the dry ingredients for the topping in a large mixing bowl.
  • Cut the cold butter into cubes and cut into the drying topping bowl. You can do this with either a pastry cutter or fork. Combine the butter with the dry ingredients until well blended throughout.
  • Add vanilla and stir.
  • Evenly over the fruit with the topping and place in the oven to bake for 30-40 minutes or until topping is golden brown.
  • Serve warm with ice cream (for dessert) or vanilla bean yogurt for breakfast.

ENJOY!

If you make my recipe please post a photo to Instagram and tag me! @3spoonsofbutter_ta


Chicken Enchiladas

Enchiladas

This recipe is very dear to me, maybe that is why I haven’t posted it until now. These enchiladas are my hubby’s favorite and the dish is one of the very first meals I ever made for him. It is sentimental. When I know he needs a pick me up or a celebration meal I make these enchiladas! They are slightly spicy and oh so comforting!

Here is what you need:
1 rotisserie chicken
10 white flour tortillas
28 oz can of Red Enchilada sauce (I use medium but you can use mild if you don’t like it hot)
1 cup shredded cheddar cheese
1 cup shredded pepper jack cheese
1 tsp cumin
1 tsp chili powder
1 tsp garlic powder

Here is how you do it:

Using your hands shred the rotisserie chicken (trust me, using your hands is the easiest way).
Put the meat in a large bowl with 1/4 cup enchilada sauce, cumin, chili powder, and garlic powder. Stir to combine.

Spray or grease a 9×13 pan and heat oven to 350 degrees.

One at a time, take a tortilla and set in the pan. Place the seasoned meat in a line down the center of the tortilla. Sprinkle cheddar cheese on top of the meat and roll the tortilla. Place the first one at one end of the pan. Continue filling and rolling until the pan is full.

Pour the rest of the enchilada sauce over the tortillas, making sure to cover EVERY THING. Smother it. I don’t want to see any tortilla.

Top the enchiladas with the shredded pepper jack cheese. Mmmmmhmmmm. You just know that is going to be melty and delicious when it is piping hot!

Cover and bake for 35-45 minutes or until bubbly.
Top each helping with sour cream and serve with black beans and a fresh salad.
ENJOY!

A couple key pieces that make these the best damn enchiladas? Rotisserie chicken, adding sauce to the meat mixture, cheese inside AND outside, and using WHITE FLOUR tortillas. I know, I know… white tortillas are not the healthy version of this dish but this is a comfort meal and the way the white tortillas soak up the sauce is one of the most important aspects of this recipe! Trust me.

A bonus with this meal: It is really easy to duplicate and stick extras in the freezer for a quick weeknight dinner or to take a meal to a friend!

Berries All Year Round!

REJOICE! It is berry season here in Oregon but we know that this season is short so we gobble them up, make jam and pies, and then cry because for the rest of the year we have to pay astronomical prices for small containers of flavorless berries from hothouses.

But I’m here to tell you… WEEP NO MORE! You can enjoy your local, plump and juicy berries all year round with this one tip.

Wash your berries, lay out in a single layer to dry, and freeze in a single layer. Once frozen use a spatula to remove and toss them in a freezer-safe plastic container with a lid.

Berries All Year Round
DSC02768

When you’re ready for some berries on your yogurt, in your oatmeal, or in a smoothie in the middle of December simply take out a few and wait a couple minutes for them to thaw. That’s it!

Why did I take the time to write to this seemingly simple post? Because most people wash the berries and toss them straight into a freezer bag. But when you go to use them later in the year they are frozen into one solid brick and when they thaw you have a mushy, liquid mess that is only good for making a cobbler or crisp (maaaaybe). Take one extra step to freeze them in a single layer BEFORE storing them and it will make all the difference.

Veggie Frittata
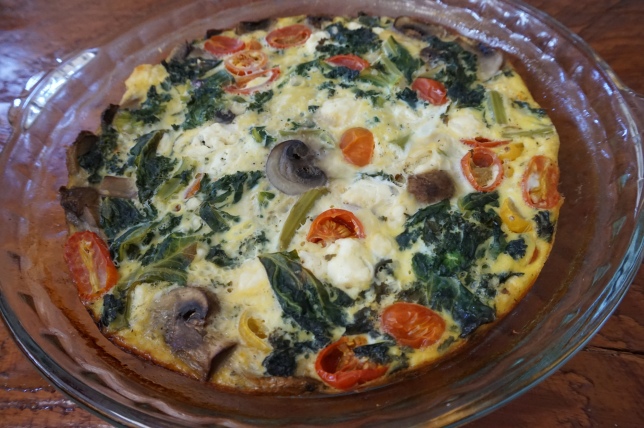
Kale FrittataI have a confession. This week I ate bad. Really, really bad. My husband and I looked at each other while holding our stomachs, with that look…you know the one. The “why did you let me eat the bagel breakfast sandwich, Italian sub, pizza, and cinnamon wheel?!” And that was just one day. I told you! I’ve been bad.
We needed a refresh and I had just the thing to get our reset started. AND fortunately this is one of those recipes where you can use pretty much any veggies you have in the fridge. I love to these frittatas because you can literally just throw it together and it is so delicious!

I use kale, tomatoes, and mushrooms in this version but I’ve made many variations: Spinach, Tomato, Sweet Onion, and Provolone. Broccoli, Ham, and Cheddar. Asparagus, Sweet Onion, and Parmesan.

What You Need:

8 eggs

2 cups of chopped kale

3 mushrooms, sliced

1 cup chopped tomatoes

1/4 cup crumbled feta

salt, pepper, and granulated garlic to season


How You Do It:

Preheat oven to 350 degrees.

In a large pan add 1/4 -1/2 cup water and kale. On medium high heat toss kale and cover for 5 minutes. Remove lid and season to your liking with salt, pepper, and granulated garlic. Cover for another 2-3 minutes or until kale is wilted.

In a medium mixing bowl crack and scramble your eggs. Stir in feta.

Butter a glass pie plate and add cooked kale, mushrooms, and tomatoes.

Pour eggs over the top. Cover with foil and bake for 45 minutes.

Take out of the oven, slice yourself a piece, enjoy!


Pumpkin Scones with Maple Coffee Glaze

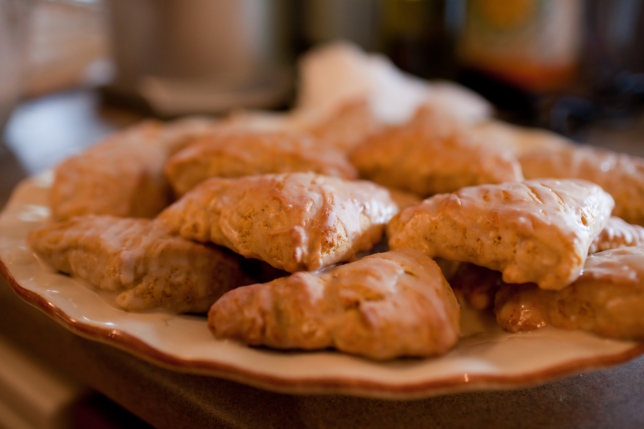
Pumpkin Scones

I’m reposting this recipe (which I originally posted in 2013) because it is OCTOBER and these are just so delicious with a cup of tea or coffee. So make these this weekend and sit down a cozy blanket and a cup of tea, maybe watch Hocus Pocus, and ENJOY OCTOBER!

—–
I love this post SO much and I don’t even know where to start.

I love SCONES.

I love PUMPKIN anything.

I love TEA and SCONES.

I LOVE FALL.

I LOVE my sister, with whom I made these scones.

So just in time for Halloween, make these delicious scones with a Maple Coffee Glaze (glaze is adapted from The Pioneer Woman, but I used REAL maple syrup and half and half)!

Recently I was visiting my sister in Colorado for a week and this was one of the many (and I mean MANY) delicious treats that made together.

Cooking with my sister is definitely one of my absolute favorite things to do! We get to laugh, be creative, dance with rolling pins in our hands pretending they are microphones, and then EAT!

Here’s what you need:
2 cups All Purpose Flour
1/4 cup plus 3 Tbsp Sugar
1 Tbsp Baking Powder
1/2 tsp Salt
1/2 tsp Ground Cinnamon
1/2 tsp Ground Nutmeg
1/4 tsp Ground Cloves
1/4 tsp Ground Ginger
6 Tbsp Cold Butter
1/2 cup Canned Pumpkin
3 Tbsp Half and Half
1 large egg

MAPLE FROSTING:
2 Cups Powdered Sugar
2 tsp Real Maple Syrup
1/2 cup Half and Half
1/4 cup Melted Butter
1/4 cup Brewed Coffee
1/8 tsp Salt

Here’s how you do it:

In a medium bowl, whisk together the pumpkin, egg, and half and half.

In a separate bowl, mix your dry ingredients together.

Cube your butter and add to the dry ingredients.

Using a pastry cutter, combine the butter and dry ingredients until it resembles a coarse meal.

Adding the wet mixture to the dry mixture, gradually fold in the wet mixture until all is combined.

Your dough should now be somewhat of a ball in your bowl.

Cover with plastic wrap and place in fridge for 30 minutes. (This will make it easier to manipulate
the dough)

Take out of the fridge and roll out the dough on to a lightly floured surface.

Make a rectangle with the dough.

Using a pizza cutter, slice the dough to make triangles.

I prefer to cut the dough from top to bottom 4 times, and then from side to side 3 times. This makes squares that you can easily cut diagonal for 2 small scones per square!

Place scones on a baking sheet covered with parchment paper or a silicone baking mat.

Bake at 425 degrees for 15 minutes.

Remove from oven and place on a cooling rack.

In a large bowl, whisk together all of the glaze ingredients until it is smooth.

The glaze should be somewhat thick, if it is not thick enough, add more powdered sugar.

After the scones have cooled enough so that your fingers won’t burn to a crisp if you touch them, use a small spoon and drizzle the glaze over the scones while they are still on the cooling rack.

Use as much glaze as you like, just a little or go ahead and just dip the whole thing in there.

These are such a treat to have on Halloween morning, with friends for a Falloween tea, or to bring to Thanksgiving to snack on while you create your feast! Enjoy this season that boasts such rich flavors like pumpkin and apple cider. And most importantly, share these scones with someone you love!

Camping Skillet Breakfast

DSC00940

My husband and I both love to travel and one of our favorite things to do is camp in our 1967 Aristocrat Trailer. Each summer we try to get out a few times and it is even more fun when we go with family or friends!

Aside from the beauty of nature, exploration, late night campfires, and the gooey s’mores, I love the meals that we have while camping. A few years ago I was given breakfast duty and I created this hearty, skillet breakfast and it is now a favorite of ours. Whether you are pitching a tent and cooking over an open flame or rolling in an RV this tummy warming skillet breakfast will be a new tradition for you. Not only is it packed with flavor but the prep makes it really easy to throw together so you can spend more time with friends and family!

I am all about the prep when it comes to camp cooking. Prepping food ahead of time allows for more adventure while on vacation and, most importantly, less clean up in a tiny trailer or campsite! Below I have outlined the Prep Instructions as well as the Cooking Instructions.

What You Need:
4 Medium Sized Russet Potatoes
1 Hillshire Farm (or similar) Kielbasa (Beef or Pork/Beef)
1 small sweet onion
1 green pepper
10 eggs
1 cup shredded cheddar cheese
4 Tbsp butter
Garlic Salt
Black pepper

Here’s How You Do It:

Prep Instructions:

Prep all of these ingredients and pack in your cooler or camping fridge for ease of assembly at your campsite. You also won’t have to do as many dishes! WIN WIN!

– Scrub and bake 4 medium Russet potatoes at 400 degrees for 1 hour. Remove from oven and allow to cool completely. Dice potatoes and store in a container.
– Chop a small sweet onion, store in a food storage bag and then inside a container as to not contaminate your other food.
– Chop a green bell pepper, store in a food storage bag and then inside a container- this can be the same container as your onion.
– Slice the kielbasa sausage and store in a food storage bag or container
– Shred 1 cup of cheddar cheese and store in an airtight container as to not let in moisture from ice in your cooler.
– Pack a stick of butter- I prefer sweet cream ☺

*TIP: I HIGHLY recommend that you cook this in a 12 inch cast iron skillet. You will get the best flavor BY FAR and you will retain the heat when you transfer the skillet to your table.

Cooking Instructions:

Place your pan over medium heat and throw in that creamy butter to coat the pan. Watch it melt. Watch it sizzle. Mmmmmmmm

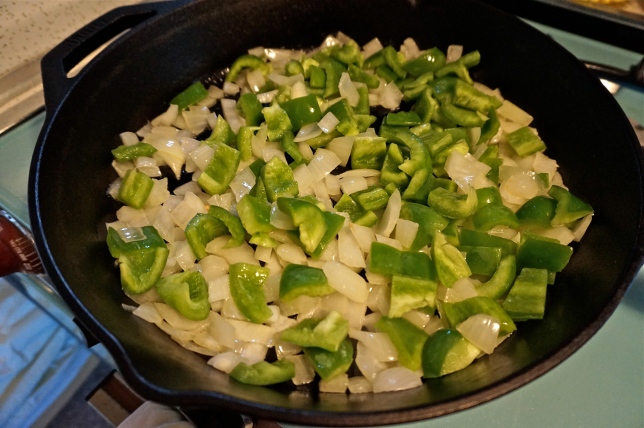
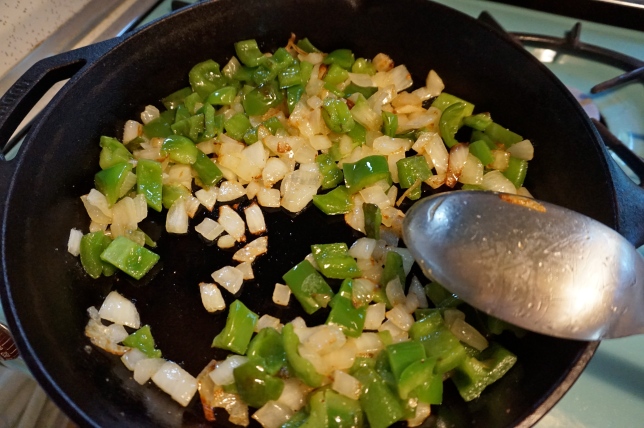
Okay, now toss in your chopped onion. Using a metal spoon sauté those onions until they are nice and soft.

Throw in the chopped bell pepper and stir to combine with the onion and coat in the velvety butter. Sauté the onion and bell pepper mixture until the onions start to get slightly brown. (Notice my cute, vintage, teal stove that I am cooking on in the Aristocrat!)
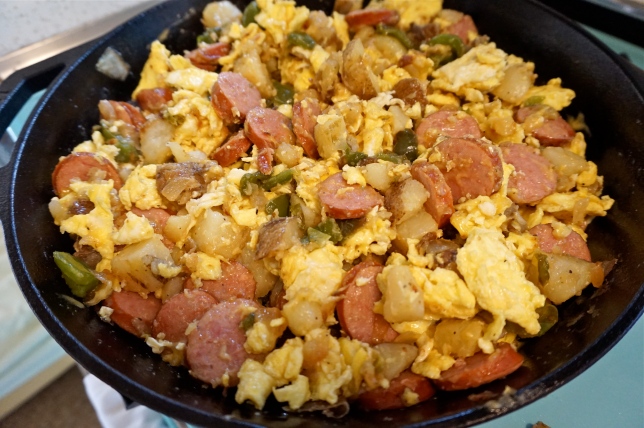
Camping Breakfast Skillet

DSC00928

At this point you’ll need to toss in the remainder of the butter for good measure! This will also help the potatoes to not stick to the pan. So go ahead…toss in that butter and melt it.

Add the diced potatoes and stir to coat in the butter. Cook onion, pepper, and potato mixture for 5-10 minutes or until you get some golden brown color on the potatoes.
DSC00931

Now add your chopped kielbasa and stir everything together. Cook until you get some color on the kielbasa.
DSC00932

DSC00933

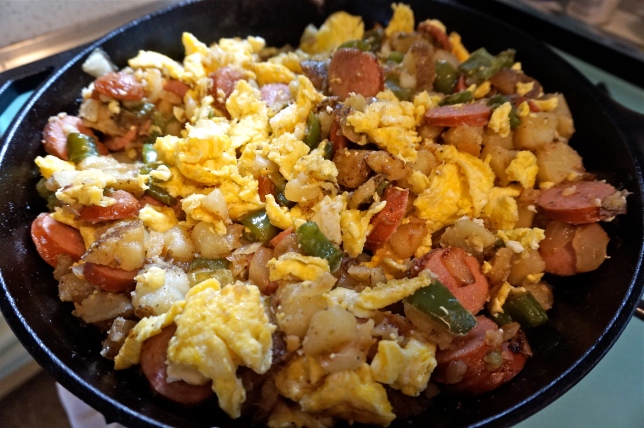
Crack the eggs, give them a whisk, and do one of two things: Either cook them as scrambled eggs and add them to your mixture after cooked or pour the whisked eggs right into your onion, pepper, potato, kielbasa mixture. I’ve done both methods and both turn out great. However, when making this dish while pregnant I opted for the first method to THROUGHLY ENSURE that my eggs were completely cooked. If you choose the second method you just need to make sure that you cook the mixture long enough to ensure that the potatoes, which have now soaked up the egg, are cooked long enough to avoid salmonella.
DSC00936

After you’ve chosen your method of “egg addition” and mixed all together, season well with garlic salt and black pepper. Give it a good stir and then sprinkle on that glorious cheese.
DSC00937

Toss all together, allow flavors to meld for another 5 minutes, and serve up a big, heaping pile of this hearty breakfast on to your plate. ENJOY!
DSC00940

DSC00942
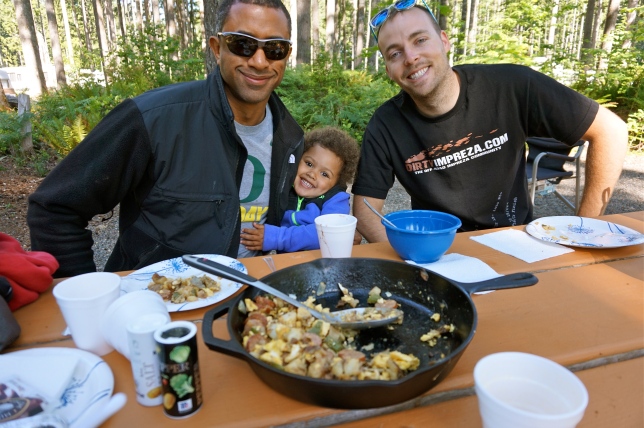
Enjoying the skillet breakfast with my brother in law, niece, and my husband on our most recent camping trip!

Pineapple Teriyaki Meatballs

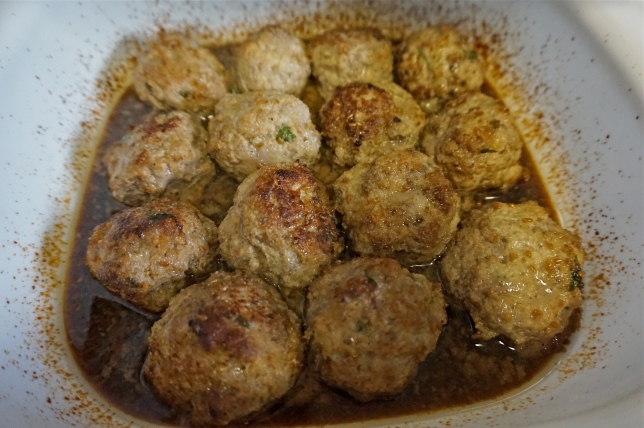
Pineapple Teriyaki Meatballs

We live in the Great Northwest and there is an abundance of wild game around here. Two years ago I found myself suddenly stocked with 65 lbs of venison after my husband got his first deer. I was at a loss as to what to do with ALL THAT MEAT! Especially because the gamey taste of venison is not my favorite. Are you right there with me? I know I’m not alone! I began researching and experimenting and I finally created these appetizing meatballs!

A couple tips as to why these meatballs will even go over well with your picky eaters: 1) Because I am one of those picky eaters and I approve! 2) The soy sauce, toasted minced onions, and garlic really mask the gamey flavor 3) The teriyaki sauce that I created below is truly the finishing touch for this dish to win over the skeptics.

What You Need:

Meatballs:
1 lb Venison or Elk (for the non-game version use lean Ground Beef)
1 lb Ground Turkey or Pork (do not use Turkey Breast, it will be too dry)
½ Cup Bread Crumbs
2 Eggs
Splash of Milk
1 Tbsp Soy Sauce
1 tsp Toasted Minced Onions (From Penzey’s Spices)*
1 tsp granulated garlic
1 Tbsp Black Pepper
1 tsp Salt
A handful of chopped Fresh Parsley

*If you do not have nor do you want to purchase the toasted minced onions you can saute and cool some sweet onions and add to your mixture. HOWEVER, I highly encourage you to check out Penzey’s Spices https://www.penzeys.com or their store location in Clackamas, Oregon.

What You Do:

DSC00217
In a large mixing bowl combine all ingredients and mix thoroughly with your hands. Don’t even attempt to use a spoon; it will take for-ev-er and you won’t achieve the same mixture. Use gloves if raw meat bothers you.

Cover a large plate or sheet pan with wax paper.

Use either a cookie scoop or spoon to scoop meatball mixture into your hands.

DSC00221
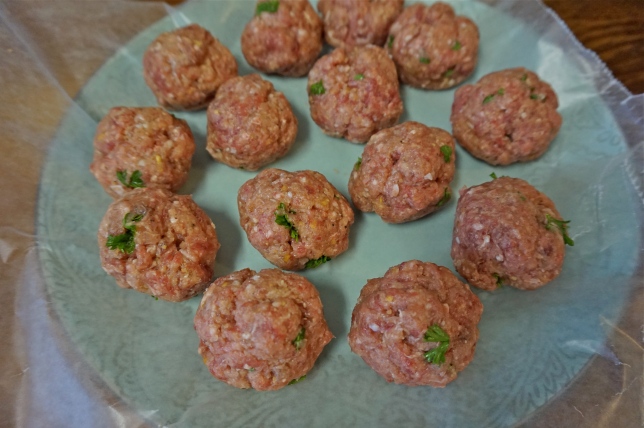
Roll into balls that are about 1- 1½ inch high. Place on wax paper.

Once you have rolled out the meatballs, place them in the freezer for 15 minutes to firm up.

DSC00224
In a large pan heat ¼ inch olive oil on medium heat. Add the meatballs and brown on “each side”. Does that make much sense when they are balls? Well it will make sense when you are doing it! *TIP: Use LONG tongs to turn your meatballs over to the other side to brown. I even use an oven mitt and the long tongs because I don’t want to be splattered with hot oil.

Teriyaki Meatballs
Remove meatballs from the heat and place in a baking dish. Now you can either eat them right away (with the Teriyaki sauce below) or allow to cool and then freeze them for use later! If you freeze the meatballs just remove from the freezer and toss them in your favorite sauce. Heat until meatballs are hot all the way through.

Using the Pineapple Teriyaki Sauce recipe below create the sauce, pour over the meatballs, and bake for 15 minutes at 350 degrees to ensure they are thoroughly cooked.

Pineapple Teriyaki Sauce
1 ½ cups water
¼ Cup soy sauce
¾ Cup brown sugar
1 tsp granulated garlic
3 Tbsp corn starch
¼ cup fresh pineapple juice (you can use canned if you are not using a fresh pineapple for the chunks)
*Reserve 1 cup fresh, chopped pineapple
*For a spicier version add 1 tsp dried red chili flakes.

My husband LOVES pineapple so I created this special sauce for him and it has quickly become a favorite. There is NO point in buying Teriyaki sauce when you usually have these ingredients in your pantry- minus the pineapple but without the pineapple you are still making a yummy sauce.

Here’s What You Do:
In a small saucepan combine all ingredients; place over medium heat. Continually whisk as to not burn the sauce on the bottom. *TIP: due to the high sugar content you can quickly and easily scorch the sauce. Don’t step away for too long!

Bring to a slow boil as you continue to whisk for 2-3 minutes. Remove from heat and allow to rest and thicken.

Top your meatballs in your baking dish with the fresh, chopped pineapple.

Finally, pour the Teriyaki over all of the meatballs.

Serve over some short grain brown rice and enjoy!
Pineapple Teriyaki Meatballs

Variations:
You can cook these meatballs with a variety of sauces so toss them in your favorite BBQ, Marinara, or Teriyaki sauce! Speaking of Teriyaki sauce, follow my recipe before for my easy Pineapple Teriyaki Sauce.

Flaky Pie Crust

I’ve never been a big baker. I have always loved to cook but that’s because I enjoy throwing things together that have complimentary flavors. But the science of baking is what turns me off. I MUST put in 1 and 5/6 cup of flour and 1 tsp plus 1/8 tsp of baking powder??? I CAN’T TAKE THE PRESSURE!!

But, I love to learn and embrace challenges I face so a few years ago I started making pies…mostly because they are delicious but partially to learn something new. I have loved to cook my whole life but I never made a pie crust until 3 years ago when I decided to make my first pecan pie for Thanksgiving. I read many recipes and the reviews and tried a few for myself.

In my experiments I found that the key elements to the perfect pie crust are: cold shortening, cold water, and white vinegar. Got it? Good ☺

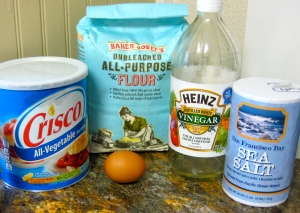
Here is what you need:
IMG_6463
3 Cups All Purpose Flour
1 ½ Cups Vegetable Shortening, chilled
1 Tablespoon White Vinegar
3-5 Tbsp Cold Water
1 Egg, lightly beaten
1 tsp Salt

This recipe makes 3 crusts. Use all now or freeze for later. They

Measure flour into a bowl.

Add chilled shortening, one spoonful at a time, and using a pastry cutter combine the flour and shortening until the mixture resembles coarse meal.
IMG_6475

Now, there is this ongoing debate out there as to whether you should use butter or shortening for pie crusts. I choose to use shortening because I love a really flaky pie. “But, Tiffany”, you say, “Your blog is called ‘3 Spoons of Butter’” Yes, well in this case shortening comes out champion but butter is still the MVP!

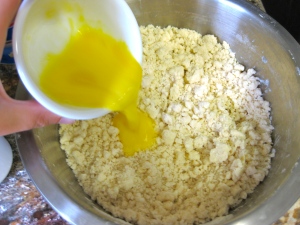
Next, the egg, vinegar, 3 tablespoons of water, and salt; stir together. If the dough appears too dry add another tablespoon of water. Do not stir too much or it will become tough.
IMG_6477

IMG_6480

IMG_6483

IMG_6484

IMG_6487

IMG_6491

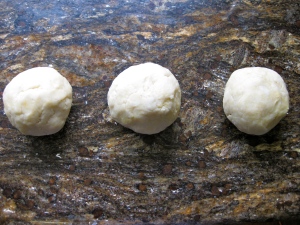
Separate the dough into three balls and place on wax paper.
IMG_6494

If you are going to use the dough now, place them in the freezer for 15 minutes to firm them up and then take them back out. If you are going to save one or all for later put each crust in a quart size freezer bag, flatten to 1 inch thick with your rolling pin, then stack in the freezer.

If you are going to use them right now, sprinkle a little flour on the wax paper or hard surface that you are going to roll the dough out on.
IMG_6542

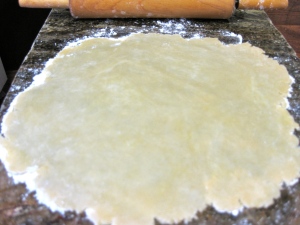
Press the dough out slightly and sprinkle lightly with flour. Rub flour on your rolling pin as well. Start to roll the dough out and every 4th roll pick up the dough and rotate it. This trick will keep the dough from sticking to the surface and ripping pieces off.
IMG_6543

IMG_6545

Once you have rolled out your dough to be about 12 inches in diameter, lay it in your pie pan and press gently into the bottom and the edge. Form whatever kind of top edge you want AFTER you have filled the middle with your delicious contents.
IMG_6543

IMG_6545

IMG_6547

IMG_6550

IMG_6552

IMG_6553

IMG_6555

IMG_6557

I use this crust for sweet pies and savory pies such as Chicken Pot Pie, Steak and Mushroom Pie and Quiches.

Enjoy!!

Much love,
Tiffany

Holiday Stuffed Mushrooms

DSC00200

This is possibly my most favorite appetizer for Christmas and the most requested one from my family. Savory, creamy, cheesy, and of course, bacon-y. Mmmmm mmmm mmmmm! These are the most perfect, bite-sized way to start your holiday.

As I’m sitting here typing this my mouth is watering and suddenly I’m very anxious for all the Christmas parties for which I will make these. In my opinion no one should ever serve their guests something that they haven’t tasted themselves so make sure you adequately sample these once, twice, maybe even three or four times if you have to! The happiness of your guests is at risk! You must take this very seriously ☺.

*Make sure to read this recipe all the way to the bottom for a spicy twist.

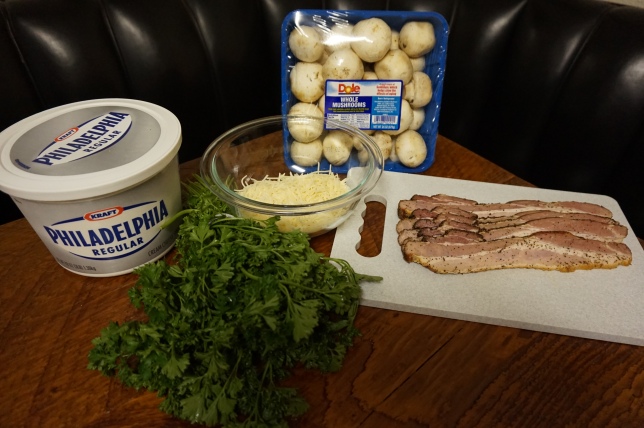
Here’s what you need:
Stuffed Mushrooms
40 Mushrooms with stems still on
1 Cup of Cream Cheese (or 1 8 oz block)
1 Cup and another ½ Cup Shredded Parmesan Cheese
10 slices cooked, cooled, and chopped pepper bacon.
¼ Cup Washed and Chopped Fresh Parsley
3 Cloves Minced Garlic
Olive Oil
½ tsp Salt
1 tsp Pepper

Here’s how you do it:

Cook bacon. My tip? Bake it in an oven set at 425 degrees for 15 minutes. No splatter on your stove. No burning your fingers off. And the kitchen will still smell of glorious bacon!
DSC00151

DSC00161

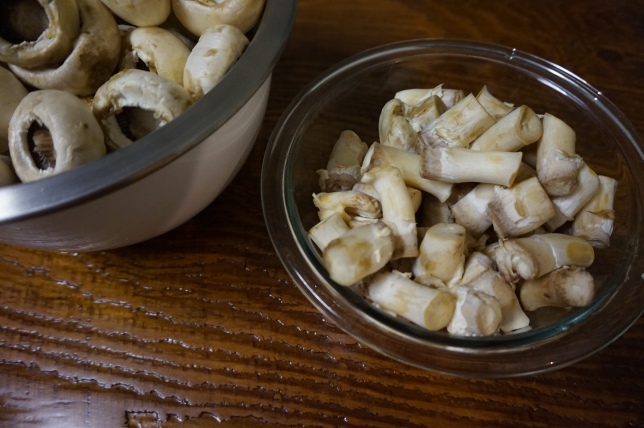
Clean the mushrooms and remove stems by holding closely at the attached base and snapping off the stem.
DSC00158

Chop the stems and sauté in olive oil and minced garlic. Season stems with salt and pepper. Remove from heat and set aside.
DSC00165

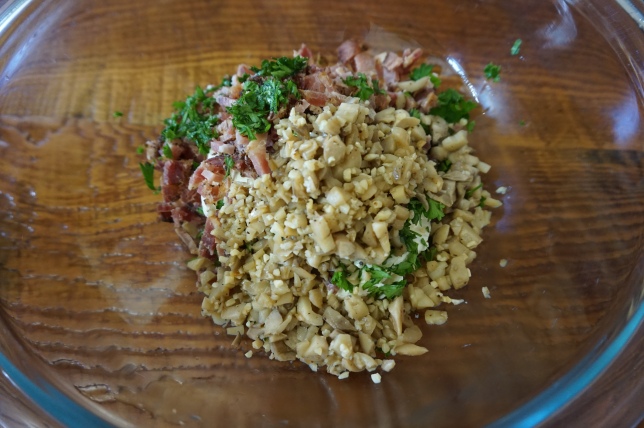
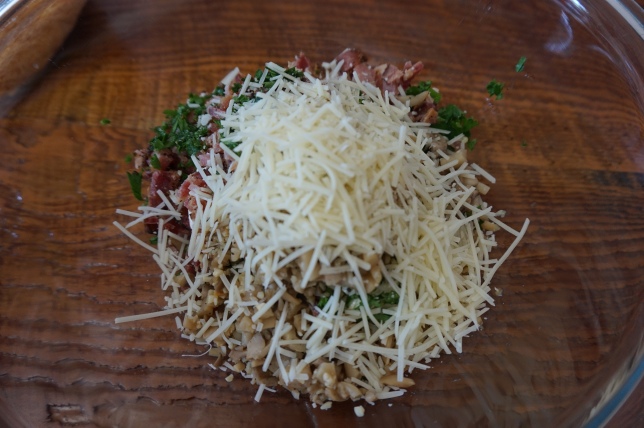
Combine cream cheese, 1 Cup Parmesan cheese, bacon, and parsley. Add the sautéed stems and thoroughly combine.
DSC00169
mmmmmmmmmm
DSC00171
MMMMMhhhhhhhhhMMMMMMM
DSC00172

Use a spoon to fill the mushroom caps and make sure to press the stuffing down into the cap.

Place the mushrooms in a baking dish that has been sprayed with olive oil.

Sprinkle the remaining Parmesan cheese on the top of the stuffed mushrooms and place in a 350 degree oven for 20 minutes or until mushrooms are soft and the cheese on top is melted and slightly browned.
DSC00180

DSC00200

*For those who want a kick this recipe up a notch substitute Pepper Jack Cheese for the Parmesan and a can of Fire Roasted Diced Jalapeños for the parsley! Now you have made Jalapeño Popper Stuffed Mushrooms, a recipe I created for my brother, Ben.

Enjoy!

-Tiffany

Apricot Pepper Jelly

It’s the MOST WONDERFUL TIME OF THE YEAR! Parties, cocktails, good food, “interesting” relatives, reconnecting with friends, and…did I mention the food?

No doubt you will be invited to many holiday parties over the next couple of months and you will be required to bring something to share. You are already having anxiety thinking about all the shopping, preparation, cooking, and GASP cleaning you will have to do. So let me make it a little easier on you and share an incredibly SIMPLE appetizer that everyone will devour.

You can buy fancy pepper jelly at William Sonoma for $11 for a 4 oz jar or you can go the semi-home route with this recipe I concocted last year. I made this simple appetizer up because my husband has always LOVED the pepper jelly over cream cheese dip and would always suggest we bring it for parties. BUT I knew there had to be a way for me to make a delicious one that didn’t have me shelling out $60 a season on this stuff.

Here is what you need:
IMG_7662
1 12 oz jar of Apricot Pineapple Preserves (Or just Apricot)
• I buy the Kroger brand from Fred Meyer. You can use another flavor if you like but Apricot or Peach are the best!

2 tsp of Red Pepper Chili Flakes (You can adjust the amount for how much or how little heat you want)
• You can buy a container of it in the spice aisle of Costco for about $4 that will last you YEARS.

1 Tbsp water
*Crackers and Cream Cheese are for the full appetizer

Here’s how you do it:

I use a double boiler for this recipe since the preserves are high in sugar and can scorch on the bottom of the pan easily. If you don’t have a double boiler you can easily use a glass mixing bowl placed over a 4 quart pot.

Fill the bottom of the double boiler about 1/3 full with water. You don’t want to fill it too much or it will boil over later on.

Turn the heat on medium high and bring the water to a rolling boil then reduce to medium.

Spoon half the preserves into the pan and keep stirring them to move it around. The preserves will start to loosen as they are heated.
IMG_7699

Add the water and pepper flakes to the jelly and stir to combine.
IMG_7700

Reduce heat to low and cook the mixture for about 15 minutes to really combine the flavors of the sweet and spicy…this stuff is going to be SO good!
IMG_7705

Remove the mixture from the heat and transfer to a dish-ceramic or glass is best. Place this mixture in the fridge to cool.
IMG_7710

Once the Pepper Jelly is cooled (about 1 hour) you can make this appetizer:

Open a package of cream cheese and place the cheese in the center of a serving dish. Generously spoon the jelly on top of the cream cheese so that it covers the top and spills over the sides. Serve with Wheat Thins and THAT’S IT!!!
IMG_7713

IMG_7718

Seriously so easy and delicious. Enjoy!

-Tiffany